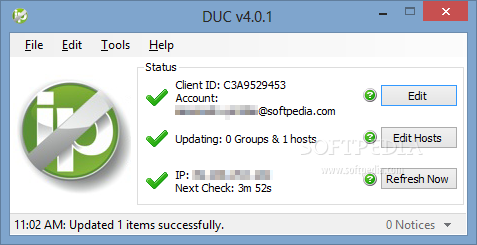
 Allow outside web accessJust like this says this section of the tutorial will show you how to allow access to your web server. I used "No-IP" for there but there are plenty of free Dynamic DNS Services out there. Setup A No-IP Account Sign Up Link For No-IP 1. Click on the above link or in google type "no-ip" and then click sign-up. 2. Fill out all of the information REMEMBER THE "HOSTNAME" FIELD!!! (This is going to be what you will type in the url to access your website. 3. Click "Free Sign Up". This allows you to host up to 3 different websites for free. A. Side note. Since this is free No-IP requires you to re-register your website every 30 days with them but hey its free! B. Also make sure to un-check "Send me newsletters & special offers" unless you want that spam crap. 4. Now on the side menu of your personal page there is an option called "Dynamic DNS (Free)". Click that and select "Dynamic Update Client" from the dropdown list. 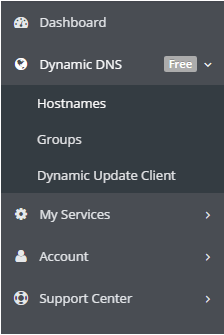 5. Select Download Now on the resulting page. 6. Launch the executable and install the client. 7. After installation. Sign in with the credentials you signed up on No-IP with. 8. You show have something that looks similar to the first picture above. Click on "Edit Hosts" 9. Under the "Manage Existing Hosts" tab make sure to check all the hosts that you want to host from this computer and click "Save". 10. Give it about 5 min to refresh with No-IP servers and Ta-Da! You are now hosting your webserver! Sweet! However, people might have problems since your router that your connected to the internet through probably doesn't have ports 80 and 443 open. You will need to port forward those ports on your router. Port Forward Ports 80 & 443 Now here unfortunately I can't give you step by step instructions since every router is different. However, there is hope! A website call PortForward has given specific instructions on how to port forward exactly for Apache! Yay! www.PortForward.com 1. That link will print you to a list of all routers that it has on file. 2. For me I am using an ASUS, so I click "Asus". 3. Then in the next window I will click the brand. 4. Then in the following window find and click "Apache" 5. Follow the instructions and you should have successfully port forwarded your router. Here is how it might look. 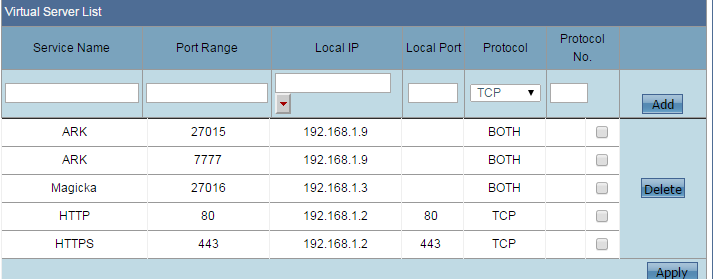 With that you are completely setup and can start using your server. However, this is unsecured. So in the next part I will be going over how you can lock down your Apache web server from malicious sources as well as secure your traffic to and from your home server.
Continue To Part 3
0 Comments
|
ArchivesCategories |
 RSS Feed
