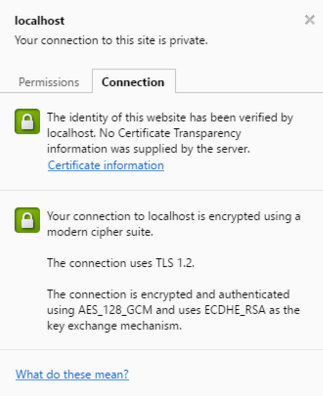
 make the connection to your server secure-Securing becomes very important as soon as you put something on the inter-webs. So I am going to go over some techniques that I did in order to create a secure connection to my home web server. Generate A Self-Signed Certificate A browser will grant a green HTTPS for a website based on the certificates installed on your computer. So we are going to generate one and give it to everyone that want to connection to my server. We are going to use a sha512 and 4069 bit key. This really isn't important but for you technical people out there you will understand why I have decided to go this route. First let’s make sure we generate a 4096 bit length key that is signed using sha512. Configure the openssl.cnf file The following makes it so we can produce a strong certificate (4096bits, sha512) 1. Open the following file C:\xampp\apache\conf\openssl.cnf 2. Search for “default_md = default” and change it to “default_md = sha512” 3. Under “[ req ]” add “default_md = sha512” 4. near the end of the file change “digests = md5, sha1” to “digests = md5, sha1, sha512” Configure httpd-ssl.conf The following removes the error saying using obsolete cipher suite. 1. Check to see if you are using SSLv2. This needs to be changed to a better, more acceptable version. Run the following command in the command prompt:  If you see that the above section says SSLv2 then continue with the rest of the instructions. 2. Open the httpd-ssl.conf file for apache. 3. Search for “SSL Cipher Suite:” 4. make that section look like the following: 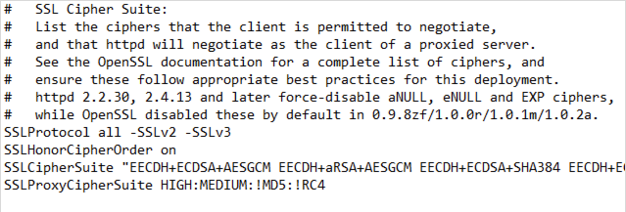 5. The code to place there is here: SSLProtocol all -SSLv2 -SSLv3 SSLHonorCipherOrder on SSLCipherSuite "EECDH+ECDSA+AESGCM EECDH+aRSA+AESGCM EECDH+ECDSA+SHA384 EECDH+ECDSA+SHA256 EECDH+aRSA+SHA384 EECDH+aRSA+SHA256 EECDH+aRSA EECDH EDH+aRSA !aNULL !eNULL !LOW !3DES !MD5 !EXP !PSK !SRP !DSS" SSLProxyCipherSuite HIGH:MEDIUM:!MD5:!RC4 Modify The “makecert.bat” File This is the command that will be executed to generate the cert. However, we need to modify it to use the new settings we have specified in other files. 1. Modify this line: bin\openssl x509 -in server.csr -out server.crt -req -signkey server.key -days 365 To look like this: bin\openssl x509 -in server.csr -out server.crt -req -sha512 -signkey server.key -days 999999 2. Then save and close the file. Generate The Certificate and Install It With all of the settings set this will generate a strong cipher and certificate to use with Apache. 1. With everything else setup previously run the “makecert” batch file supplied by xampp found in “C:\xampp\apache\makecert.bat”. 2. Then fill out all the information, the only thing that is really important here is the “common name”. This is the name of the website that you will type in so example: “localhost” or “mywebsite.ddns.net”. 3. The PEM pass you enter will also be the same password that you will enter when it asks for the pass phrase for privkey.pem. 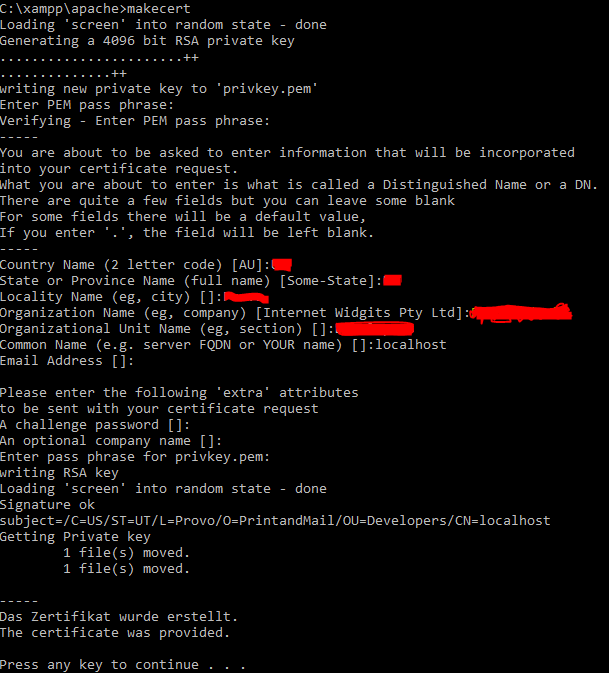 This will generate a server.crt and a server.key files in C:\xampp\apache\conf\ssl.crt\server.crt and C:\xampp\apache\conf\ssl.key\server.key. 4.Open up the ssl.crt folder and double click on server.crt. 5. Click “Install Certificate”. 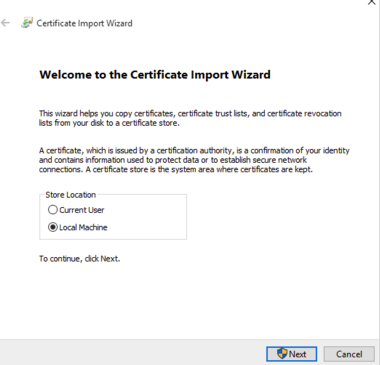 6. Select “Local Machine” 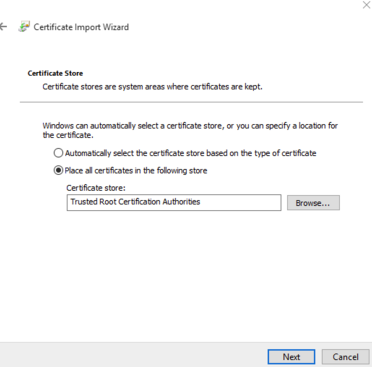 7. Select “Place all certificates in the following store” and choose “Trusted Root Certification Authorities” Click next then finish. 8. If done correctly when you double click on the certificate again it should look similar to this one: 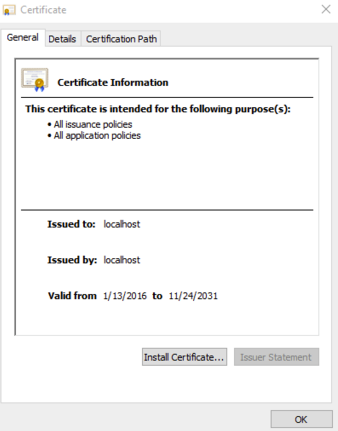 9. Then restart the apache server, clear all history information from your browsers, restart the browsers, and finally log onto the website and verify the green lock next to the url.
10. Copy the certificate that you just installed to the computer that you want to have secure access to this one. That certificate file can be found in C:\xampp\apache\conf\ssl.crt\server.crt. 11. Install it on your other computer the same way you did here. 12. Ta-DA! Secure connections. 13. Now there are plenty of other options that can be put into Apache that can secure it even more. Some things I would suggest is removing files browsing on your server (indexes). Final Notes: 1. Lower permissions in your mysql database. 2. Open my code in dropfilesBackend/protected/config look at the connection.php file in my code and change around the username and password. 3. Also crack open the main.php in the same folder and change the "Salt" to something else. 4. Force SSL (HTTP -> HTTPS), this can be accomplished by adding a few commands in the httpd.conf file in Apache (try googling). 5. Prevent access to anything in the backend folder. (Can be accomplished with .htaccess files, which i have already supplied, or in Apache config files as well)
0 Comments
|
ArchivesCategories |
 RSS Feed
